Embedding A Luzmo Dashboard In Next.js Apps Using Clerk on Vercel
When presenting customer data or visualizations in user-facing applications, security is super important. It's crucial to ensure that users can only access the data they are authorized to view.
All authentication and authorization solutions provide ways to add users to groups, or apply roles to their profiles. By accessing these roles in your application, you can limit or restrict access to parts of your application that may contain sensitive customer data.
In this article, we’ll show you how we’ve used Clerk’s user metadata to assign a role to a user's profile. From within a Next.js application, we’ve then used the role to determine which one of two different data visualization dashboards created in Luzmo to display.
Table of contents
- Why use Next.js with Vercel for your application?
- What we're building
- Getting started with Next.js
- Setting up authentication in Clerk
- Luzmo API
- Setting up collections in Luzmo
- Embedding Luzmo's dashboard component
- Deploy to production
- Conclusion
We’ve chosen to use Next.js as it’s the first framework to support React’s new Server Components (RSCs). When using RSCs, pages or components are rendered on the server only. This allows developers to write code that makes server-side requests, or use environment variables without worrying about leaking sensitive information to the client (browser).
This is super powerful when building applications that need to apply conditional logic based on a user’s profile information which won’t be exposed to the client.
We’ll build a Help Desk application that allows users to sign in with their Google Account, and based on the role assigned to their profile, defined in Clerk, we’ll determine which of the below Luzmo dashboards will be displayed.
All the code referenced in this article can be found on this GitHub repo.
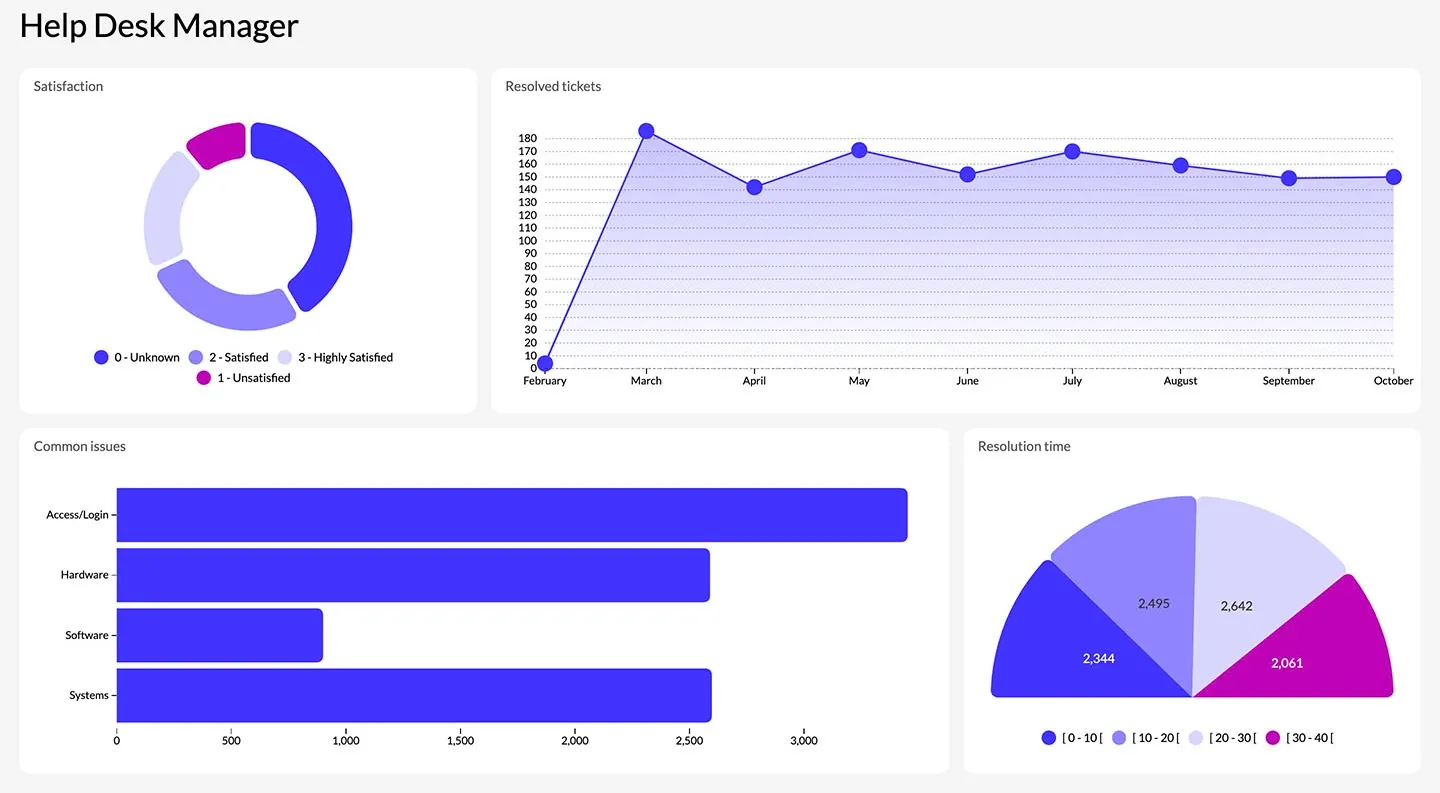
Manager Dashboard
Our manager dashboard is only visible to users with a role of manager and displays information relating to customer satisfaction, quantity of tickets resolved, the average resolution time and the top recurring issues.
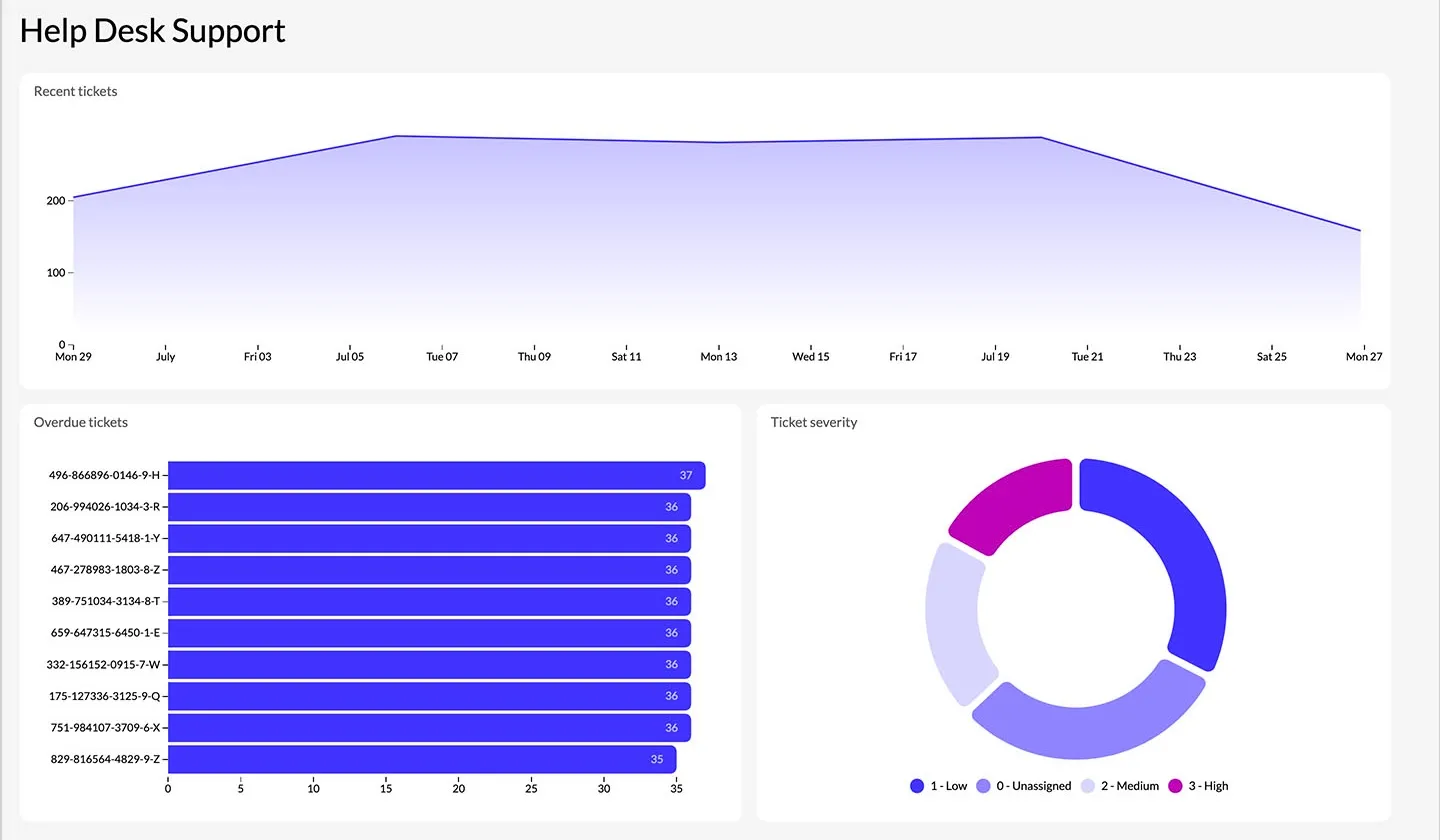
Support Dashboard
Our support dashboard is visible to users with a role that is not a manager and displays information relating to new tickets created, a list of overdue tickets and new tickets categorized by severity.
To build a Next.js application using the App router, run the following in your terminal.
Visit the Next.js documentation for step-by-step guidance on installation.
With a Next.js application setup, you can now add Clerk.
If you don’t have an account with Clerk, sign up here to get started.
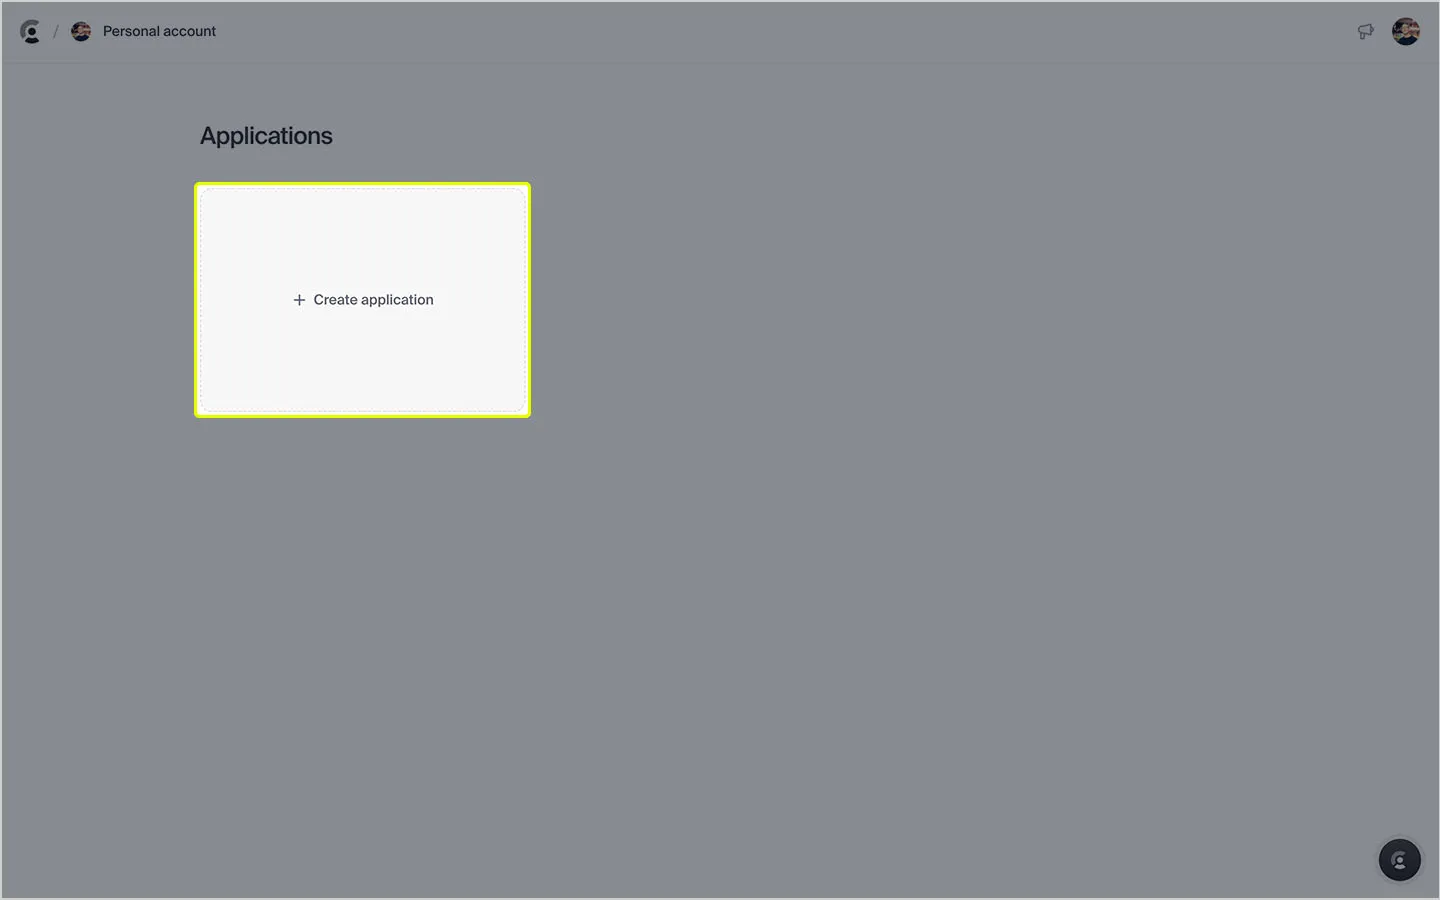
Once you’ve signed in, you can create a new application.
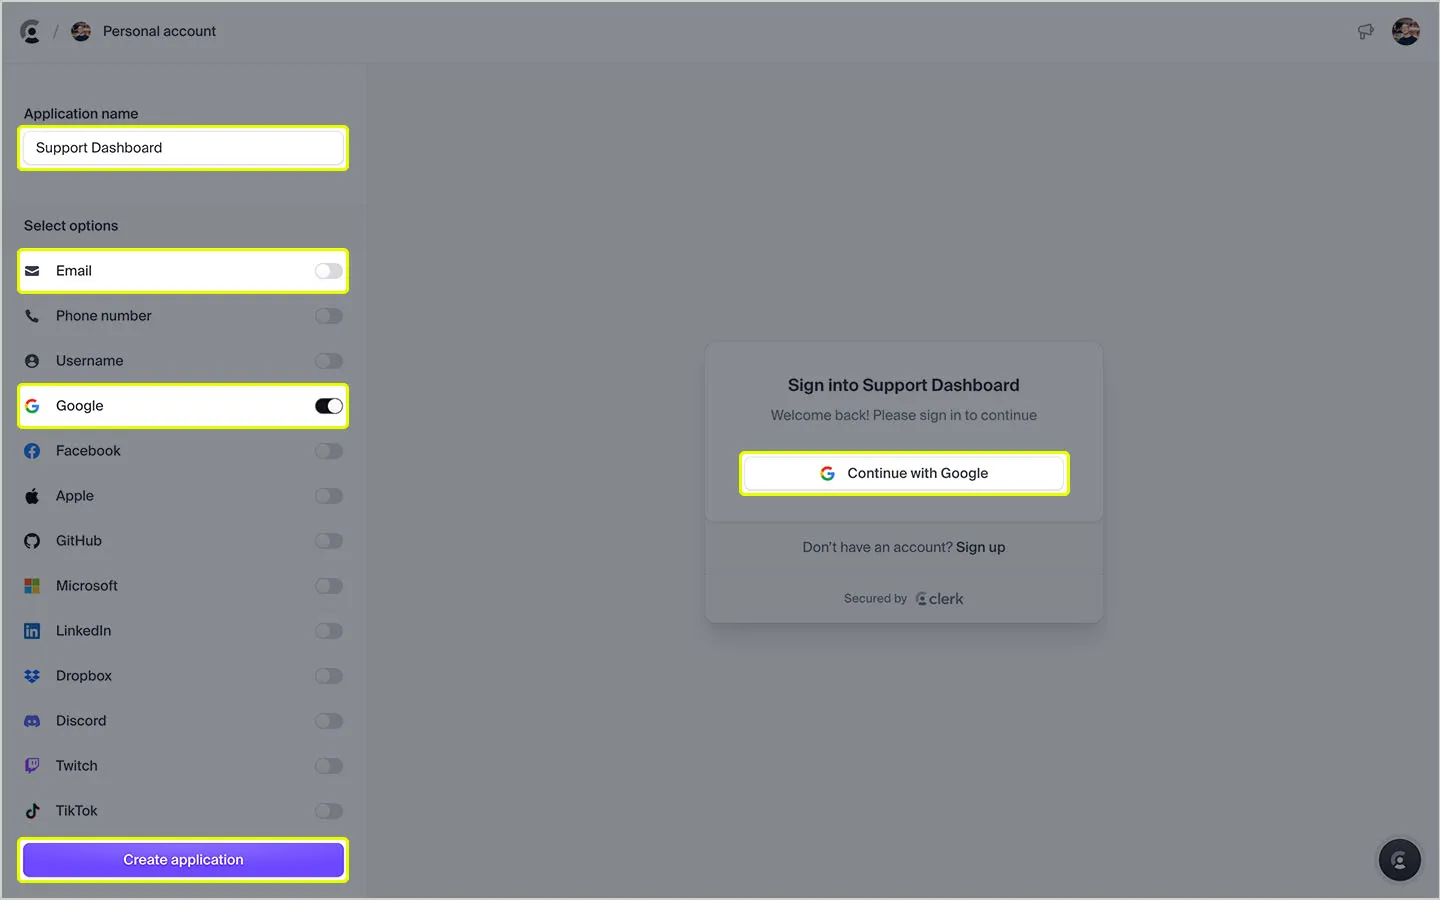
You can now give your application a name, and configure which sign-in options you’d like to use. In our application, we’ve disabled Email and selected Google as the only method that can be used by users to sign in to our app. Choose the options that best suit your requirements and when you’re ready, click Create application.
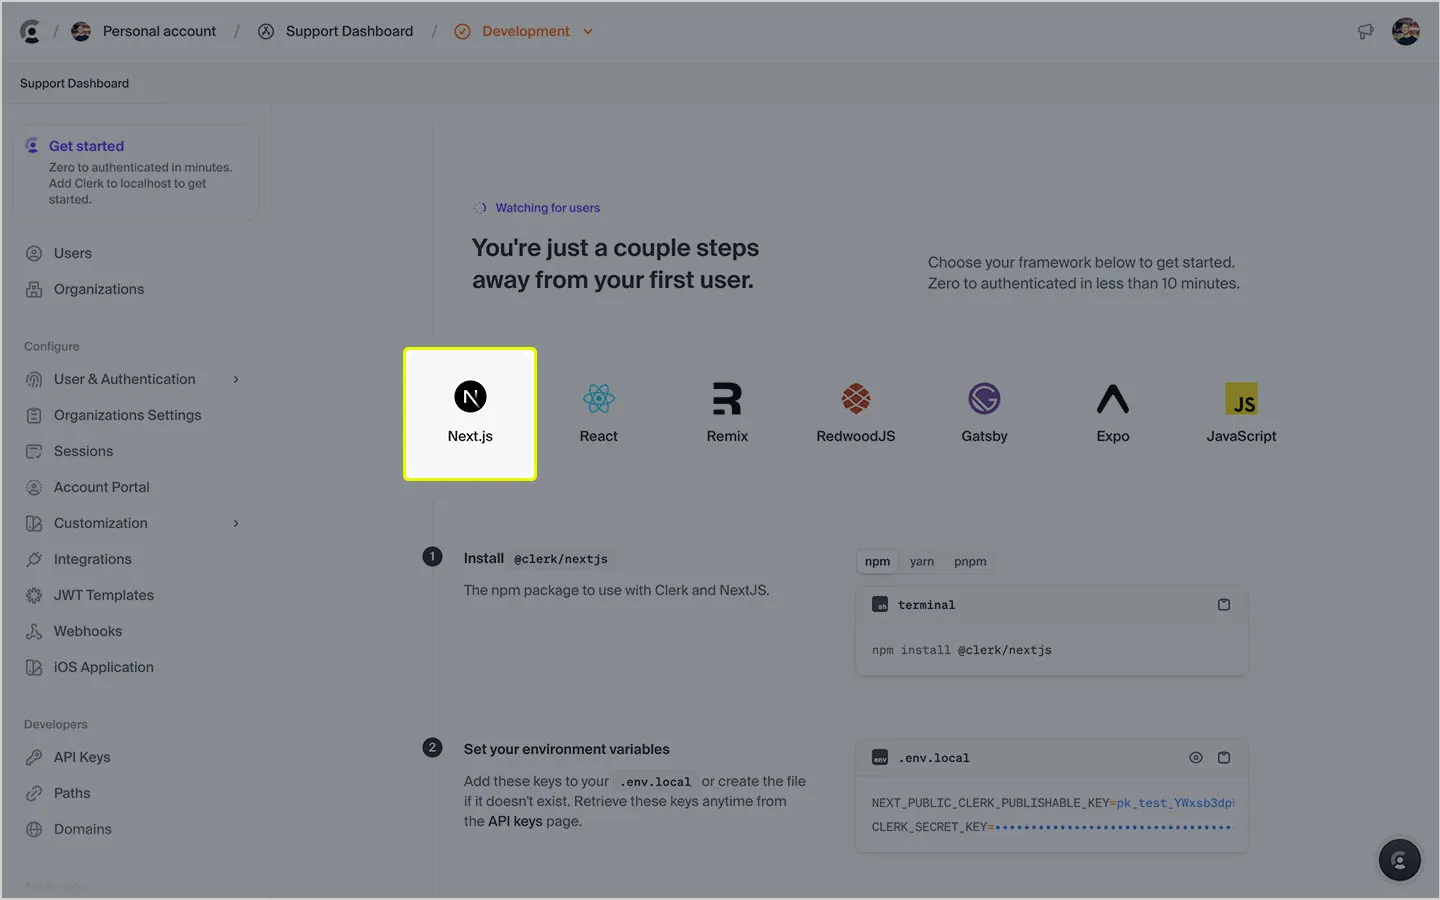
In the next step, select Next.js from the available quick-start guides and complete step 1 and 2. Steps 3 and 4 will be slightly different for the purposes of this article. Below, we’ve explained what the differences are, and why we made the changes.
Update middleware.ts
In step 3, instead of using the code snippet shown in the setup guide, use the one below.
The changes we’ve made introduce a protected route named /dashboard. Only signed-in users will have access to this route.
Add ClerkProvider to your app
In step 4, instead of using the code snippet shown in the setup guide, use the one below.
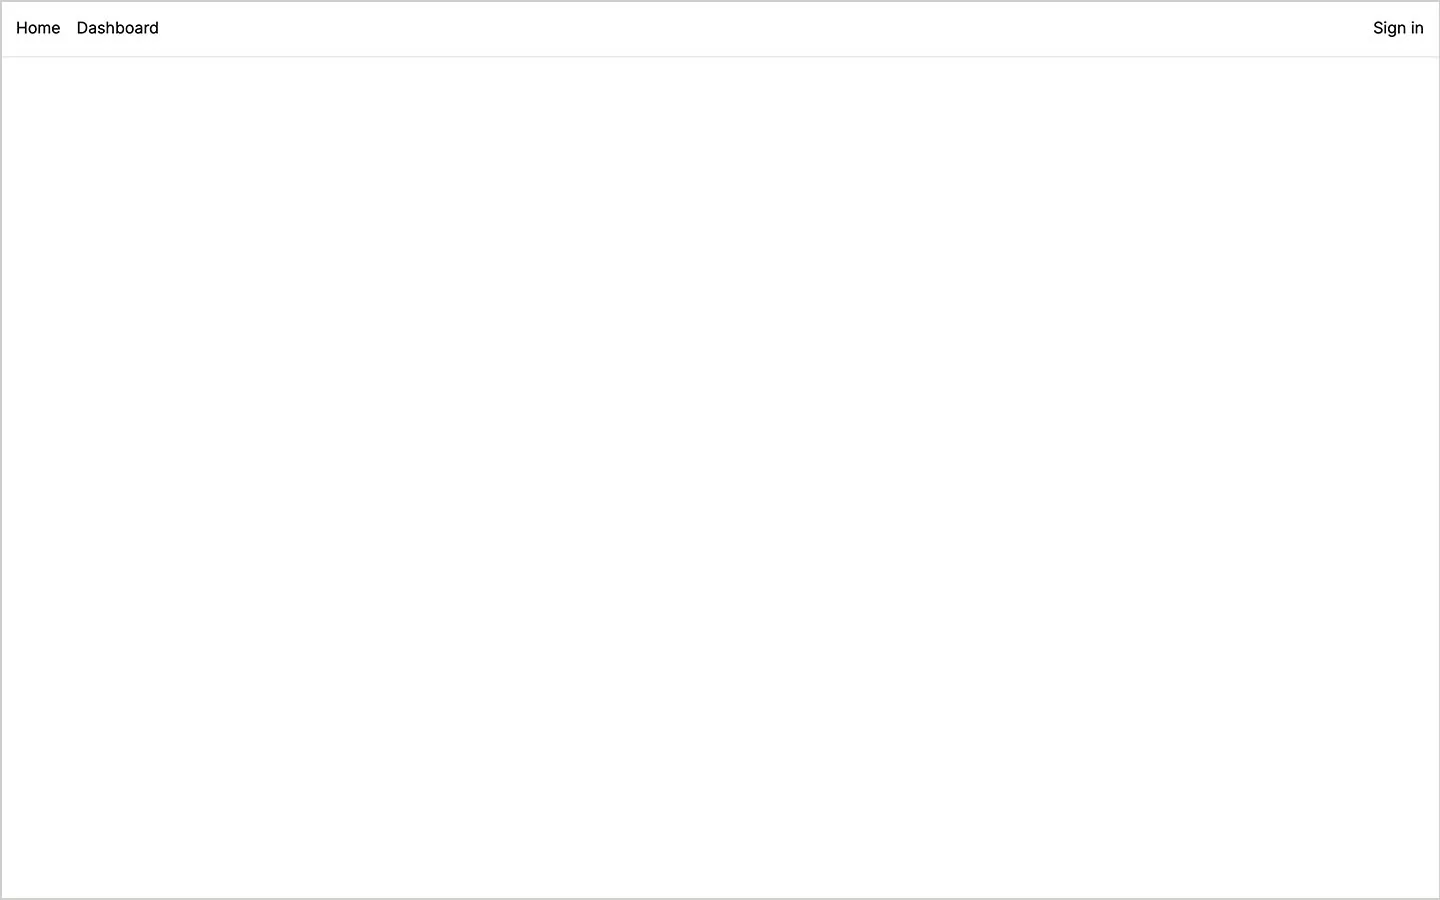
The changes we’ve made are to include an HTML header element that contains two links, one to the /dashboard, and one back to the index page. We’ve also added some CSS to more neatly position navigation links and the sign-in button.
You can also modify the index page. In our app, we’ve removed the HTML included by the Next.js installation and returned null.
Here’s a screenshot of our app.
Create the dashboard route
The last step is to create a new route which will be accessible at /dashboard.
With the page setup, you can now navigate to it using the link. If you aren’t signed in, you’ll be redirected to a Clerk sign-in page. If you are signed in, you should see the text returned in the HTML h1 element from the above code snippet.
Add Clerk metadata
If you’ve signed in once, head over to your Clerk dashboard and you should see yourself appear in the users list. Click on the item and then scroll down the page until you see the Metadata section.
Click the Edit button under the Public section.
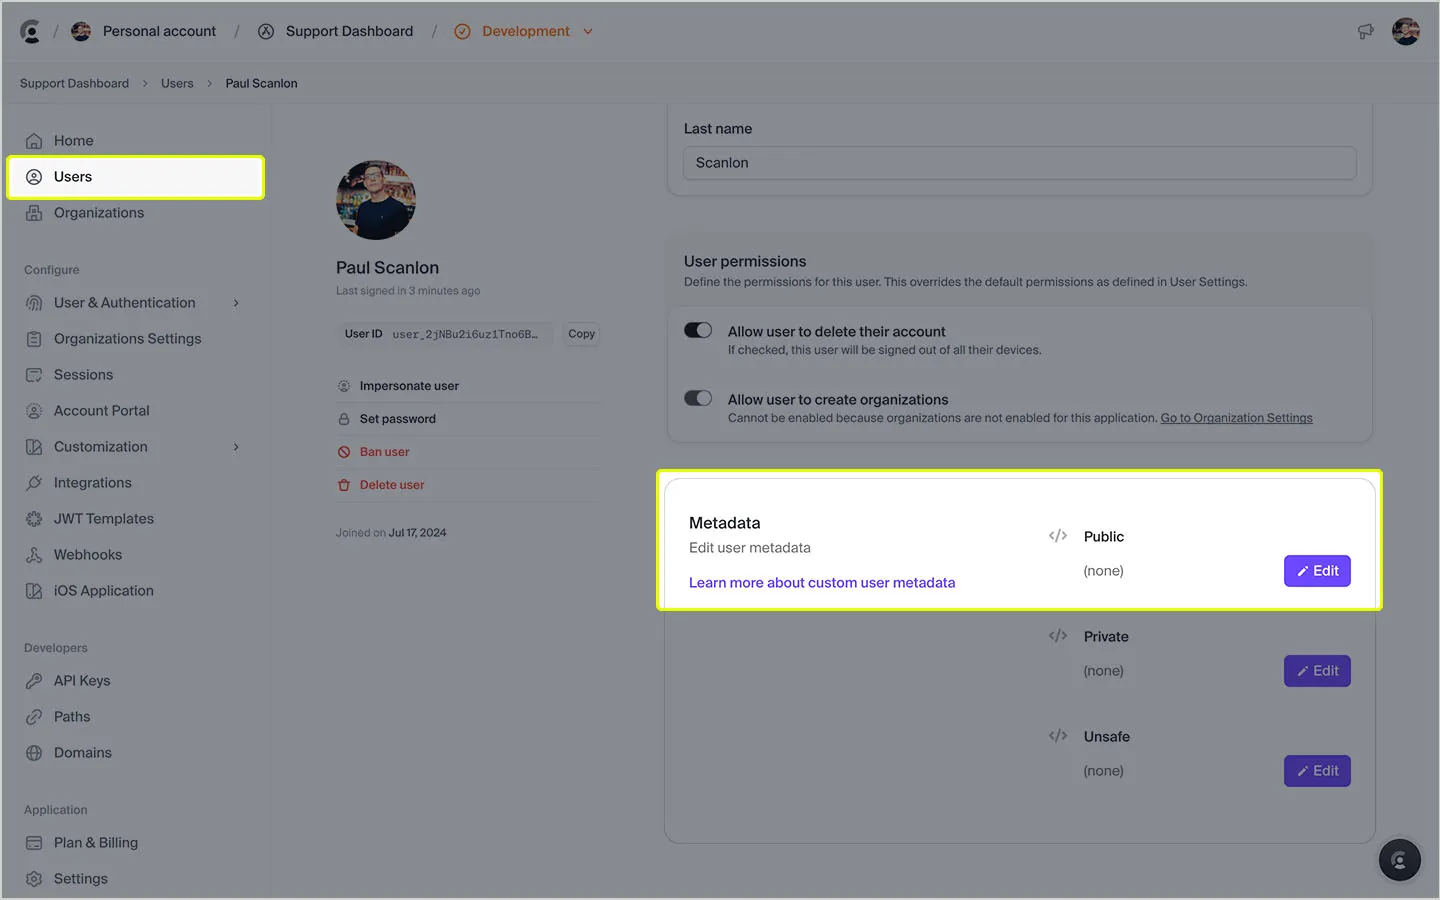
In the modal that opens up, add a key for role, and a value of manager, then click Save.
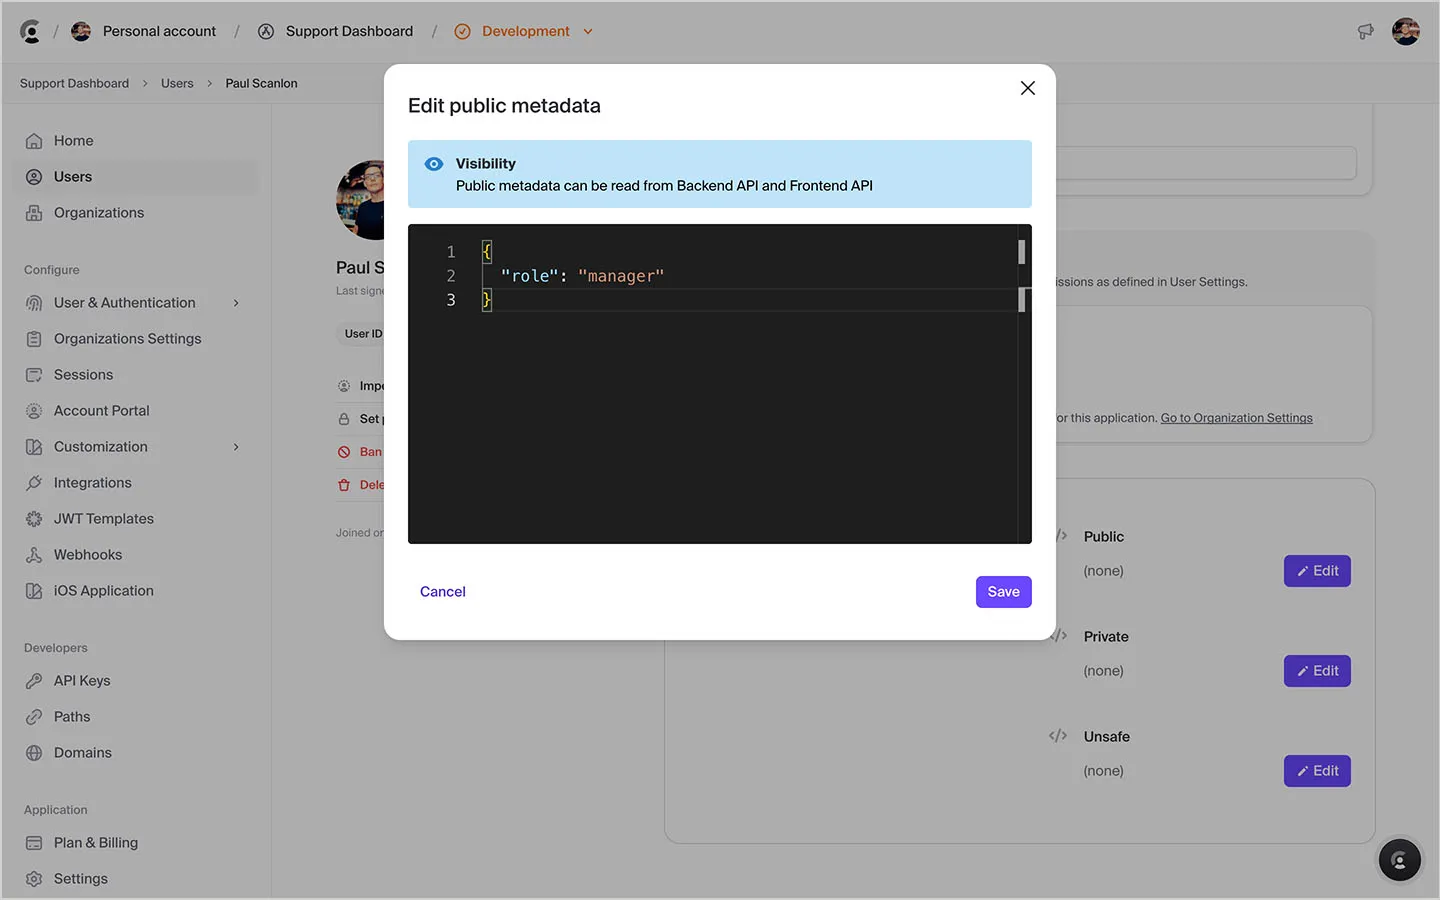
This metadata is what we’ll use to determine who has access to the Help Desk Manager dashboard. If a user doesn’t have this role in their metadata, they’ll only be able to view the Help Desk Support dashboard. This is the default until the role is manually added in Clerk.
But, before we go too much further, there are some Luzmo steps we’ll need to complete.
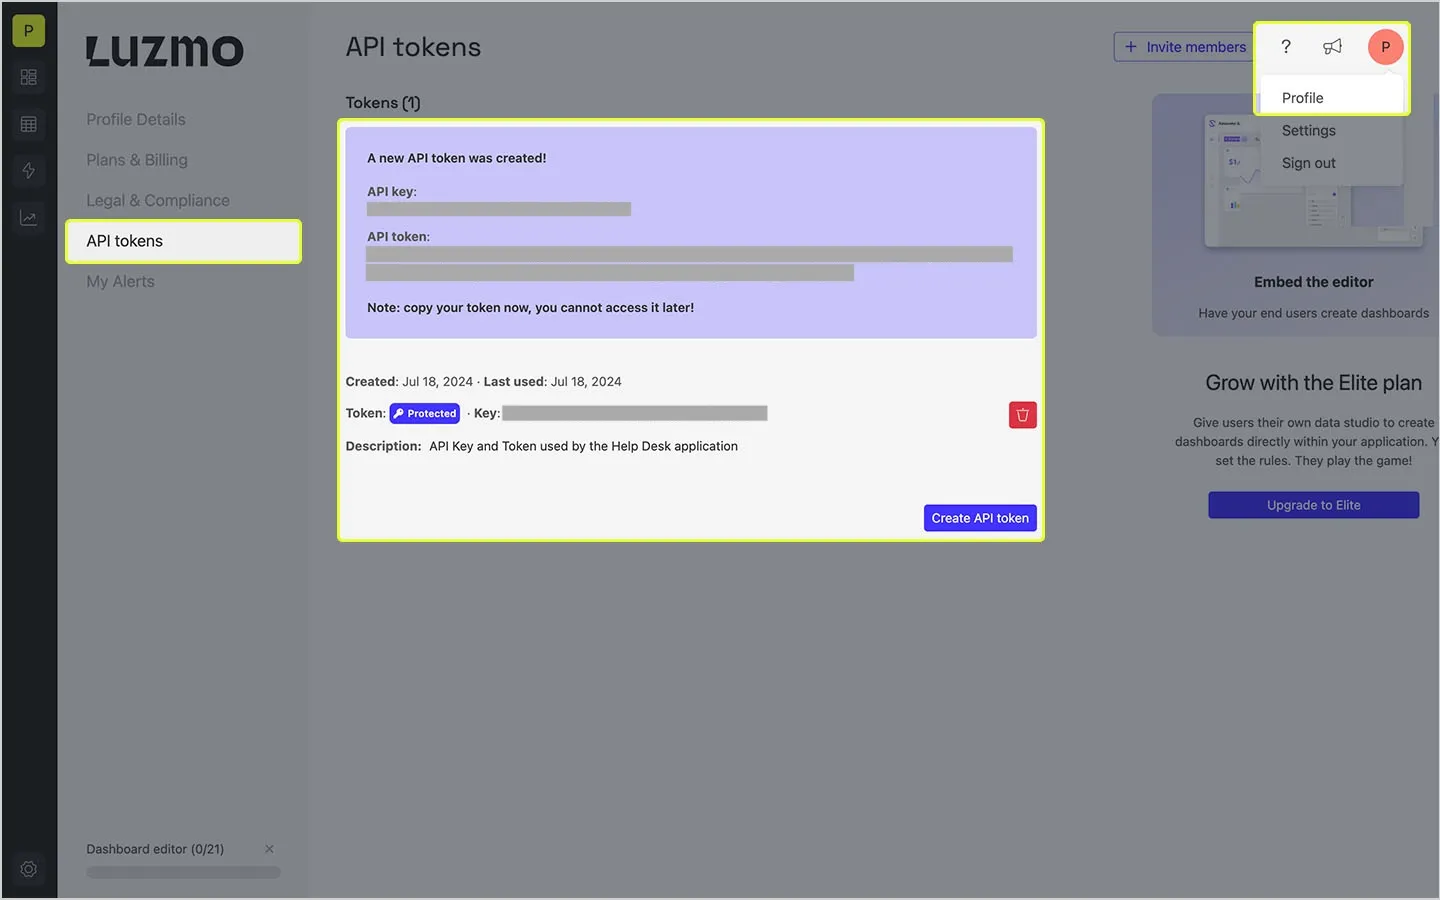
To embed Luzmo dashboards in your application, you’ll need to create an API key and API token. To do this, head over to Profile > API tokens and click Create API token.
It’s helpful to give your token a description so you know which application uses it.
Luzmo Host and Server
There’s two additional pieces of Luzmo information we’ll need. These are the Luzmo App Server and Luzmo API Host.
Depending on which region your account has been created in, you’ll either use the US or EU addresses listed below.
Ensure you don’t include a trailing slash with any of the URLs.
- 🇪🇺 EU
- App Server: https://app.luzmo.com
- API Host: https://api.luzmo.com
- 🇺🇸 US
- App Server: https://app.us.luzmo.com
- API Host: https://api.us.luzmo.com
With all the required environment variables set, you can now start creating collections.
In this step, we’ll create the two collections: one for the manager dashboard and one for the support dashboard. From your Luzmo homepage, create two new collections. For our app, we’ve created one named manager and one named support.
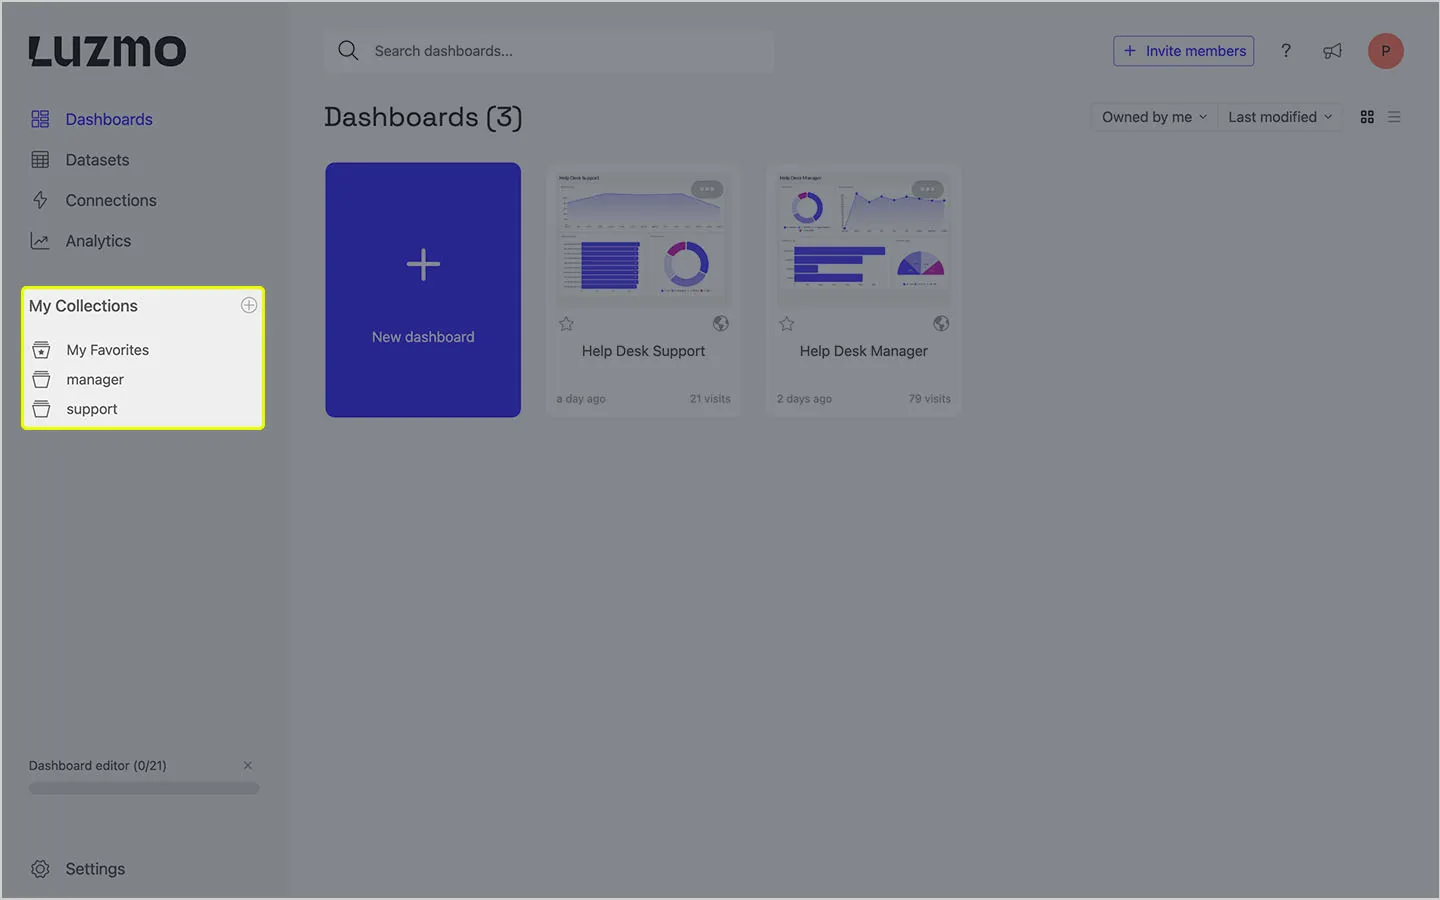
Once you’ve created your collections, click on each one and make a note of the URL in your browser's address bar, this contains the collection id. Add each one to your environment variables as we’ll need them in a later step.
Add dashboards to collections
In this step, we’ll add each dashboard to the relevant collection so that the two are associated.
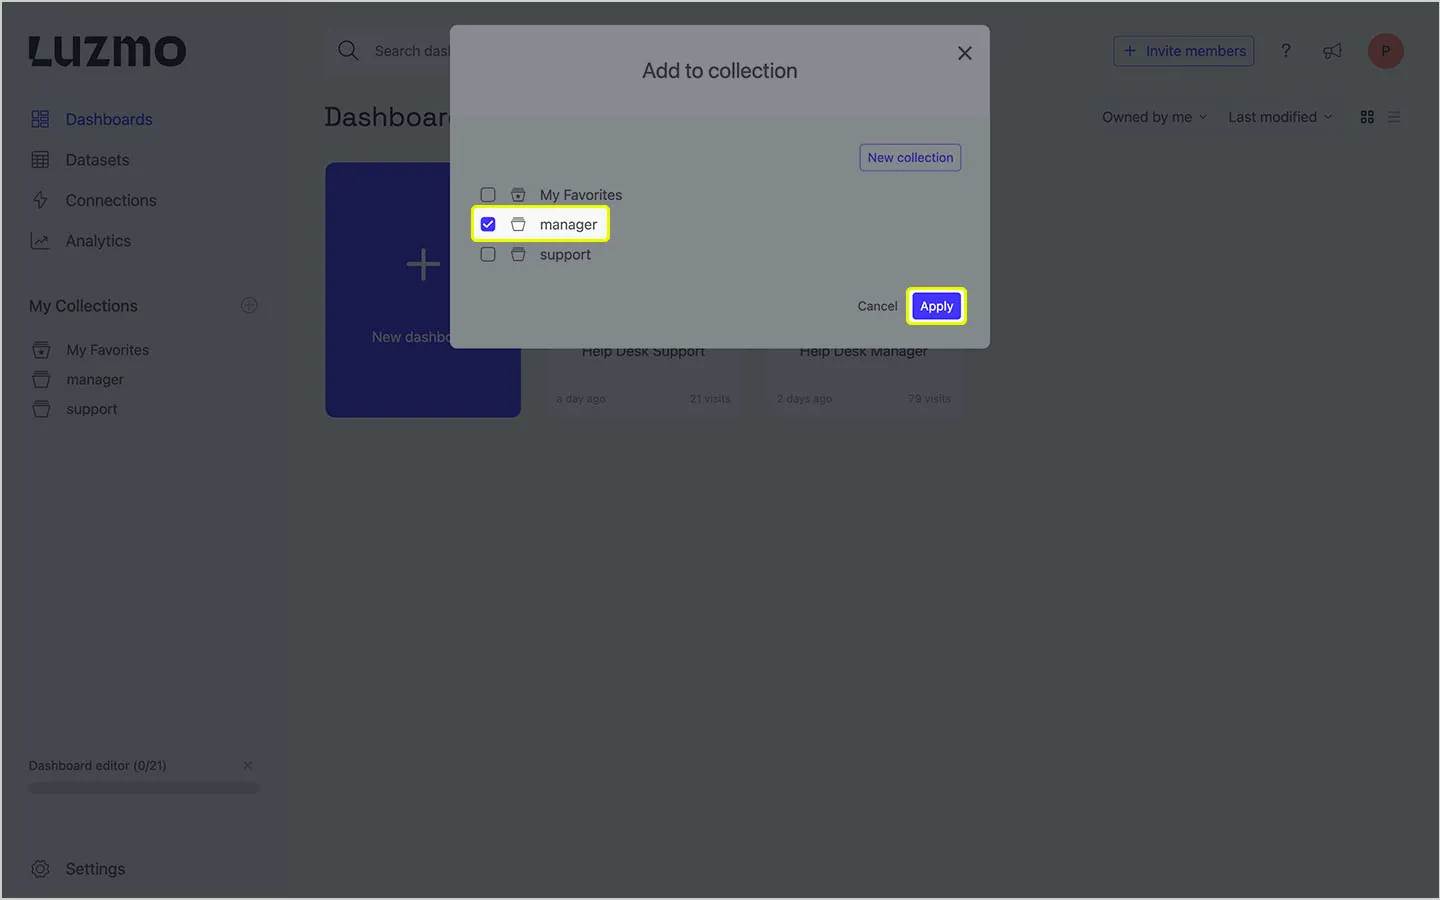
Click the “more dots” in the top right of the dashboard thumbnail and select Add to collection.
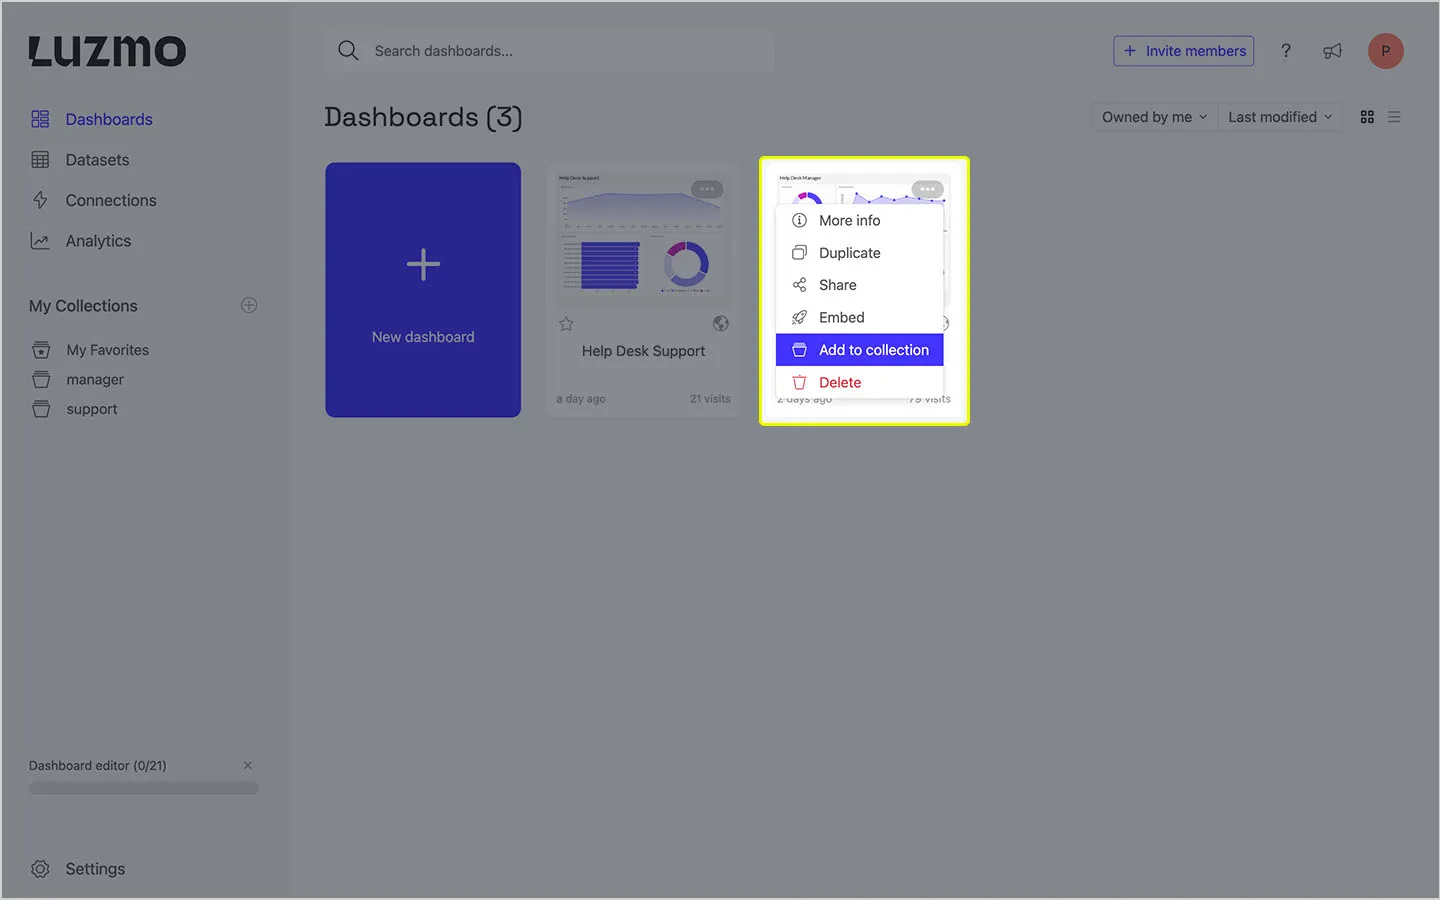
From the modal that opens up, select the collection you’d like to add the dashboard to. In our app, we’ve added the Help Desk Manager dashboard to the manager collection and the Help Desk Support dashboard to the support collection. When you’re ready, click Apply.
Dashboards can be added to, or removed from collections at any time, all from the Luzmo dashboard. In a later step, we’ll show you how you can display dashboards associated with collections for users with different permissions.
In this step, we’ll install the dependencies required to use Luzmo’s embeddable dashboard component, and create a new React component that accepts props that will be used to render the correct dashboard for each user.
To install Luzmo’s dashboard component, run the following in your terminal.
Props
You can read more about the Embedding in the Luzmo documentation.
Update /dashboard page
This is the final step where we’ll update the dashboard page. We'll include the necessary Clerk hook to determine the current signed-in user, then make an API request to the Luzmo API to grant authorization to one of the two collections.
To complete this step, you'll need to install Luzmo's Node.js SDK.
You can read more about Luzmo’s authorization endpoint in the documentation.
If you’re ready to deploy your Next.js application, follow the steps as outlined in the Vercel documentation. Similarly, there are some additional steps to complete when using Clerk in production. You can read more about deploying in the Clerk documentation.
And that’s it. Using a combination of Luzmo collections which contain specific dashboards and combining them with Clerk’s metadata, you can conditionally determine which authenticated users are authorized to access dashboards associated with a collection.
If you ever need to make permission changes, these can all be managed by your existing auth provider, no changes in Luzmo would be required. And lastly, in our Next.js app, all the logic happens server-side so there’s no chance an unauthenticated, or unauthorized user will ever see sensitive customer data, unless permitted to do so.
If you need to build secure analytics quickly, start your free Luzmo trial to get started today!
Written by

Ship the future of your data
Let us show you what Luzmo can do for your product.

Leave your e-mail and one of our analytics experts will reach out to you