Using Luzmo for Data Visualization in Next.js: A Set-up Guide
Building data visualizations from scratch can be both time-consuming and cumbersome, requiring significant effort to design and implement. Developing these capabilities in-house often involves complex coding, ongoing maintenance, and a deep understanding of data management and visualization best practices.
Luzmo addresses these challenges by offering an analytics platform that integrates with your application to provide powerful data visualization and insights. It supports real-time data syncing, customizable dashboards with a drag-and-drop interface, and AI-enhanced chart creation.
With its API-first design and advanced query engine, Luzmo offers a flexible, scalable solution for turning data into actionable insights, making it an essential tool for modern digital environments.
Whether you are using Next.js, Astro, or other app frameworks, you can create and embed low-code Luzmo dashboards (opens in new tab), or build custom charts through code using our new Flex SDK (opens in new tab). But whichever approach you take, you’ll need to generate an access token server-side first.
For any data product you’re building on top of Luzmo, this server-side token is the stepping stone to securely access and manage data. It ensures that only authorized requests are made and protects sensitive information. In this guide, we’ll explain how you can use Next.js App Router with Luzmo’s Node.js SDK to generate a token for use with our client-side components.
For your reference, we’ve prepared a GitHub repository which you can find on the following link.
How to create Luzmo API tokens
If you don’t already have a Luzmo account, sign up now before moving to the next step.
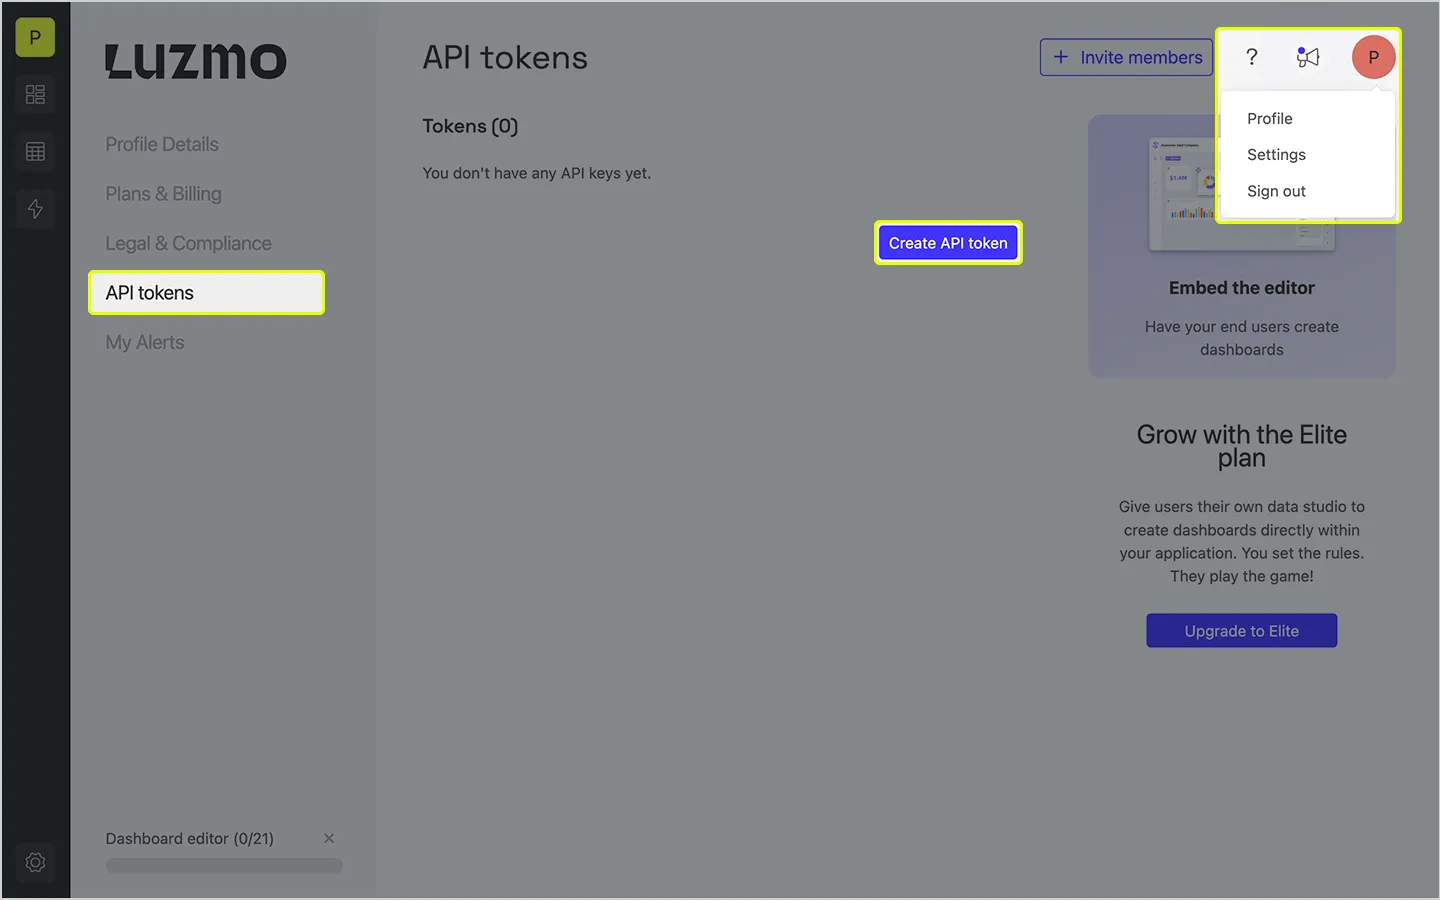
With your account created, click on your initial (in the top right of the screen) and select Profile, then API Tokens. To create a new API token, click the Create API token button.
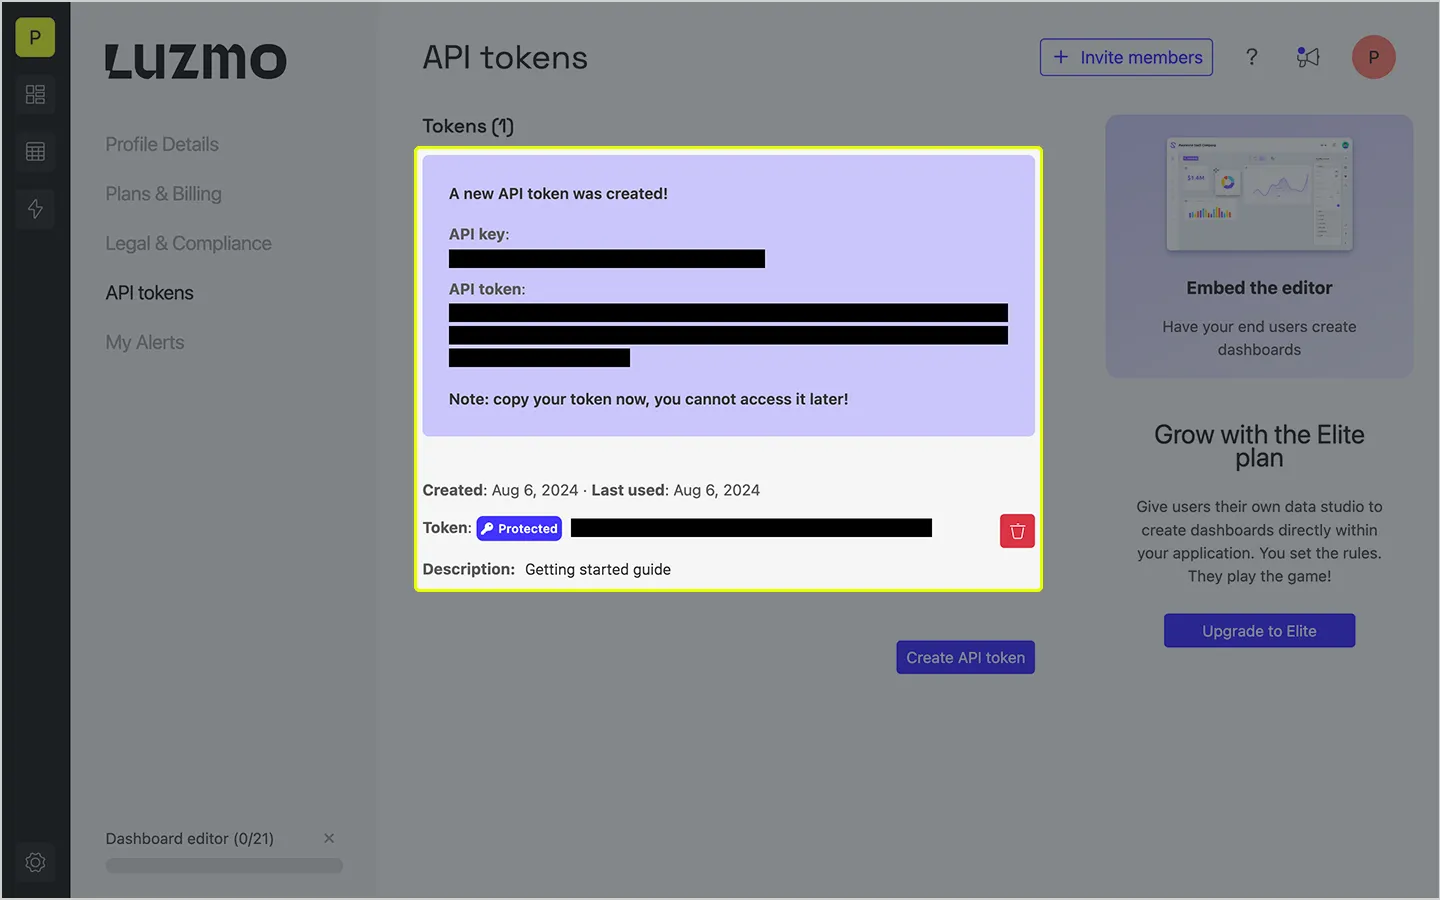
Make a note of the API key and API token generated, as you’ll need them in the following step. You might also like to give your API token a description so you know which application it's for.
That completes the Luzmo setup part of this guide. In the next step, you’ll create a Next.js application using the App Router.
Getting started with Next.js App Router
To create a new Next.js application, head over to the docs, and follow the install instructions.
For reference, these are the options we selected from the available CLI prompts.
- What is your project named? › luzmo-getting-started-next-js
- Would you like to use TypeScript? › Yes
- Would you like to use ESLint? › Yes
- Would you like to use Tailwind CSS? › Yes
- Would you like to use `src/` directory? › Yes
- Would you like to use App Router? (recommended) › Yes
- Would you like to customize the default import alias (@/*)? › No
Environment variables
Ensure you don’t include a trailing slash with any URLs.
- 🇪🇺 EU
- App Server: https://app.luzmo.com
- API Host: https://api.luzmo.com
- 🇺🇸 US
- App Server: https://app.us.luzmo.com
- API Host: https://api.us.luzmo.com
How to install Luzmo’s Node.js SDK
Luzmo’s Node.js SDK is used server-side to generate access tokens for use with client-side components.
⚠️ This is for security reasons, you do not want to expose your API key & token client-side, as that would mean that users would be able to change filters or grant access to your securables.
To get started, run the following in your terminal to install the dependency.
Create authorization
The above code sets up the Luzmo Node.js SDK client and is provided with the environment variables you set earlier.
With a client defined, you can now make a “create” request for authorization credentials that are safe to use with client-side code.
E.g.
In the next step, we’ll show you how to use those values with a client-side Next.js component.
Client-side Next.js component
- LuzmoDashboardComponent (opens in new tab): for adding a dashboard created through Luzmo’s low-code editor (opens in new tab)
- LuzmoVizItemComponent (opens in new tab): for adding visualization widgets, generated on the fly via code
Start building data products with Luzmo and Next.js
That just about wraps things up! You now have all the pieces in place to build with Luzmo and Next.js. You can create low-code dashboards and embed them into your application, personalize charts and dashboards based on user logins, and render charts dynamically using Luzmo Flex.
These features allow you to efficiently create and customize data visualizations, improving your application’s functionality and end-user experience.
Written by

Ship the future of your data
Let us show you what Luzmo can do for your product.

Book your session with our analytics expert.